This blog post is going to be a little different!
Instead of us here at Seeds of Life giving you a how-to guide, or an FAQ, or a magnificent scientific article on fungi, we’re going to bring you along on one of our projects as it’s happening.
We’re going to try something we’ve never done before: create a cut flower garden.
You know those glorious, cottage-core, built from scratch gardens you see on pinterest that look like they’re straight out of a fairy tale? Yep, that’s what we’re doing, right on our farm plots in Central Florida.
So, while this isn’t intended to be your step by step guide to building your own cut flower garden, we’ll be spelling out the steps we take to build ours. We’ll tell you what works, what doesn’t, what goes according to plan and what changes.
After months of waiting for the right time, we’re finally ready to begin. Here’s our first month of our cut flower garden!
Our Inspiration
We’re embarking on this journey for a few reasons. Our sister company, The Magnolia Company, specializes in creating bespoke, artisanal home decor from magnolia foliage. We adore our Original Magnolia Collection, which is our most popular style - it’s beautifully designed to showcase the elegance of the magnolia leaf on its own.
Most of our catalog, however, features all kinds of natural adornments! Popular inclusions are dried botanicals like yarrow, celosia, hydrangea, and roses.
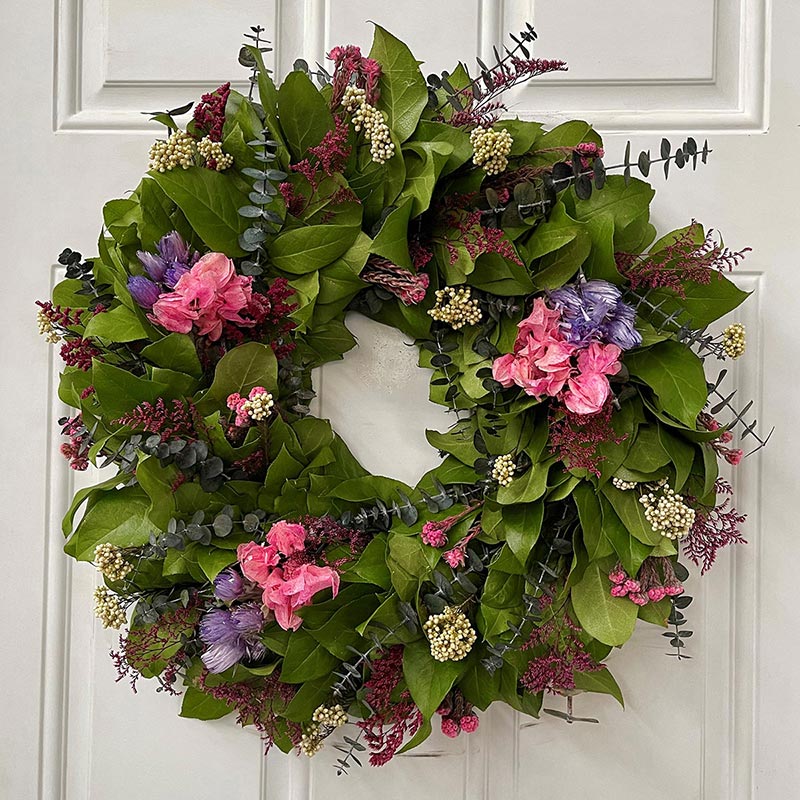
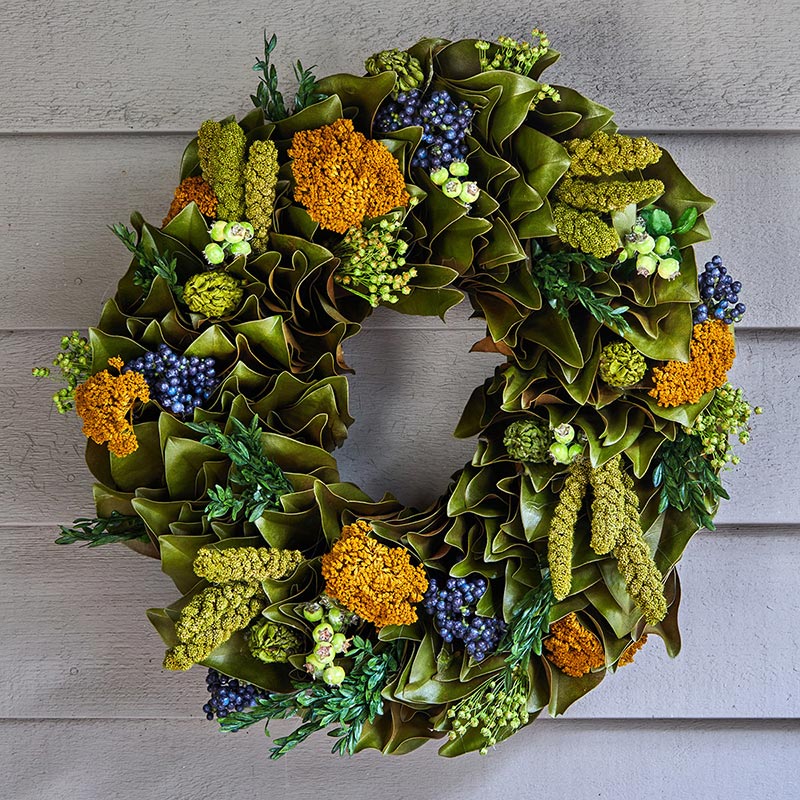
We offer so many different plants through Seeds of Life and The Magnolia Company that the main adornments we currently grow ourselves are our evergreen foliage. We’ve taken the time to cultivate nurturing relationships with other growers who specialize in dried flowers, and we think it’s time we tried our hand at doing it ourselves.
The process, when it’s successful, will conserve environmental resources and bring our assembly in house.
Sowing Seeds of Life
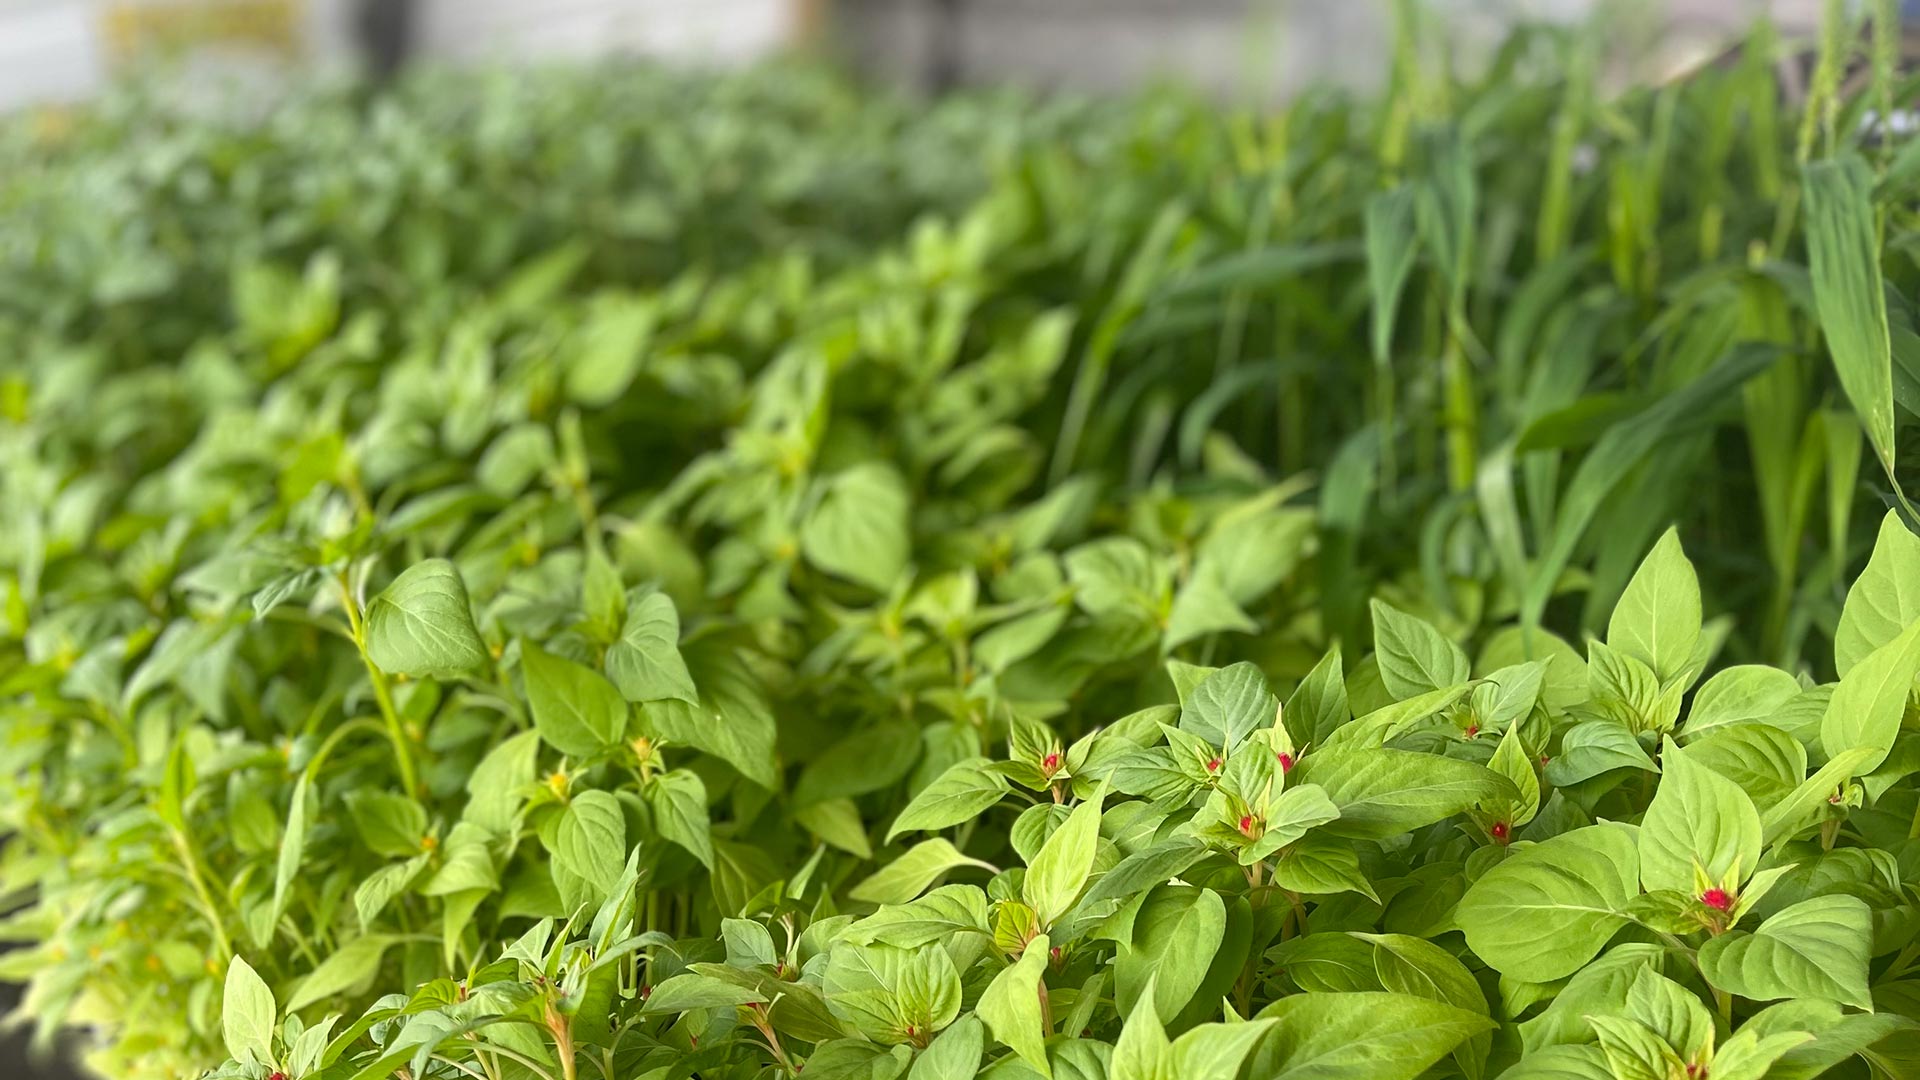
We decided to start from the ground up with this project, so we’re growing everything from seeds. Because we’re hoping to use the cuttings from these plants as dried botanicals, we need our harvesting to be complete by late summer. Each plant we selected is a relatively fast grower. With luck, we should have healthy plants within about 3 months.
Here’s what we picked:
- Copper Red Strawflower
- Peach Apricot Strawflower
- Chief Carmine Celosia
- Green Orange Celosia
- Sunball
- Sonja Sunflower
- Silvertip Grass Seed
- Summer Pastel Yarrow
All of these plants dry beautifully, have great shelf lives, and are sturdy enough to maintain a full, healthy look during our wreath creation and shipping processes.
Technically speaking, we’ve worked with these plants before. Celosia and yarrow, for example, are key components in many of our current catalog designs. They grow in so many colors and add a stunning textural element to many of our wreaths. Between our green thumb know-how and having experience with the results of these plants, we’re rather hopeful that we can continue and potentially expand this project year after year!
Getting Our Seeds in the Ground
Just like our seeds, we’re starting small. We potted each seed by hand in individual containers, so we can keep a sharp eye on the growth of each plant. The containers are currently living in our greenhouse, but we’ll eventually move them to a spot with more sunlight.
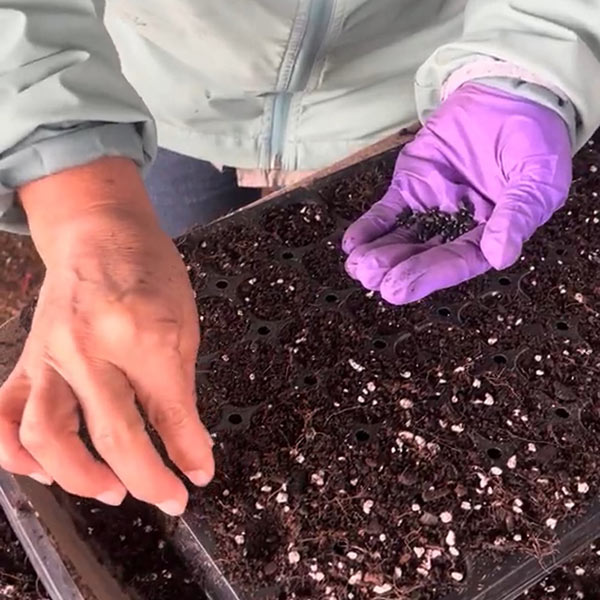
If you’re feeling adventurous and a bit curious, join us for the process! Get some seeds and well draining potting soil from your local gardening center. Lay down a hearty layer of soil in a pot, add a seed (or a pinch, depending on your seed packet’s instructions), and cover the seeds with more soil. Water your seeds thoroughly, and then set your pot on a patio or on a windowsill.
New seeds need lots of water to germinate, so be sure to keep the soil moist. As with all our advice on watering plants, the finger test works here too. If the soil feels dry when you stick your finger an inch or two into it, it’s time to water. If your finger comes away damp, wait a day or two and check again.
Not sure what to grow? Flowers that are naturally part of your local ecosystems are always your best bet because they’ll work with your area’s climate, instead of fighting against it. Honestly, wildflowers don’t get nearly enough hype (in our humble opinion). Do a quick internet search to find out what your area’s favored flora are, and go from there. You can also send us an email, and we’ll help you find a gorgeous and hardy option for your zone!
Since our farms are based in Central Florida, our warm weather comes early. It’s why we’re able to begin a project like this right around the first days of spring.
Next Steps
Now that our seeds are potted, it’s a waiting game. With careful care, we should see sprouts in a few weeks. The seedlings, once they’re big enough, will need to be repotted in larger containers or even planted in the ground so that their roots have plenty of space - we’re still deciding what we’d like to do for them on that front. We’ll be sure to keep you in the loop as we go!
Parting Thoughts
What do you think? Are you feeling inspired to grow your own seedlings? Find us on Instagram and Facebook for pictures of our progress, and as always, leave us a comment or send us a DM with your questions! We’d love to hear from you!